


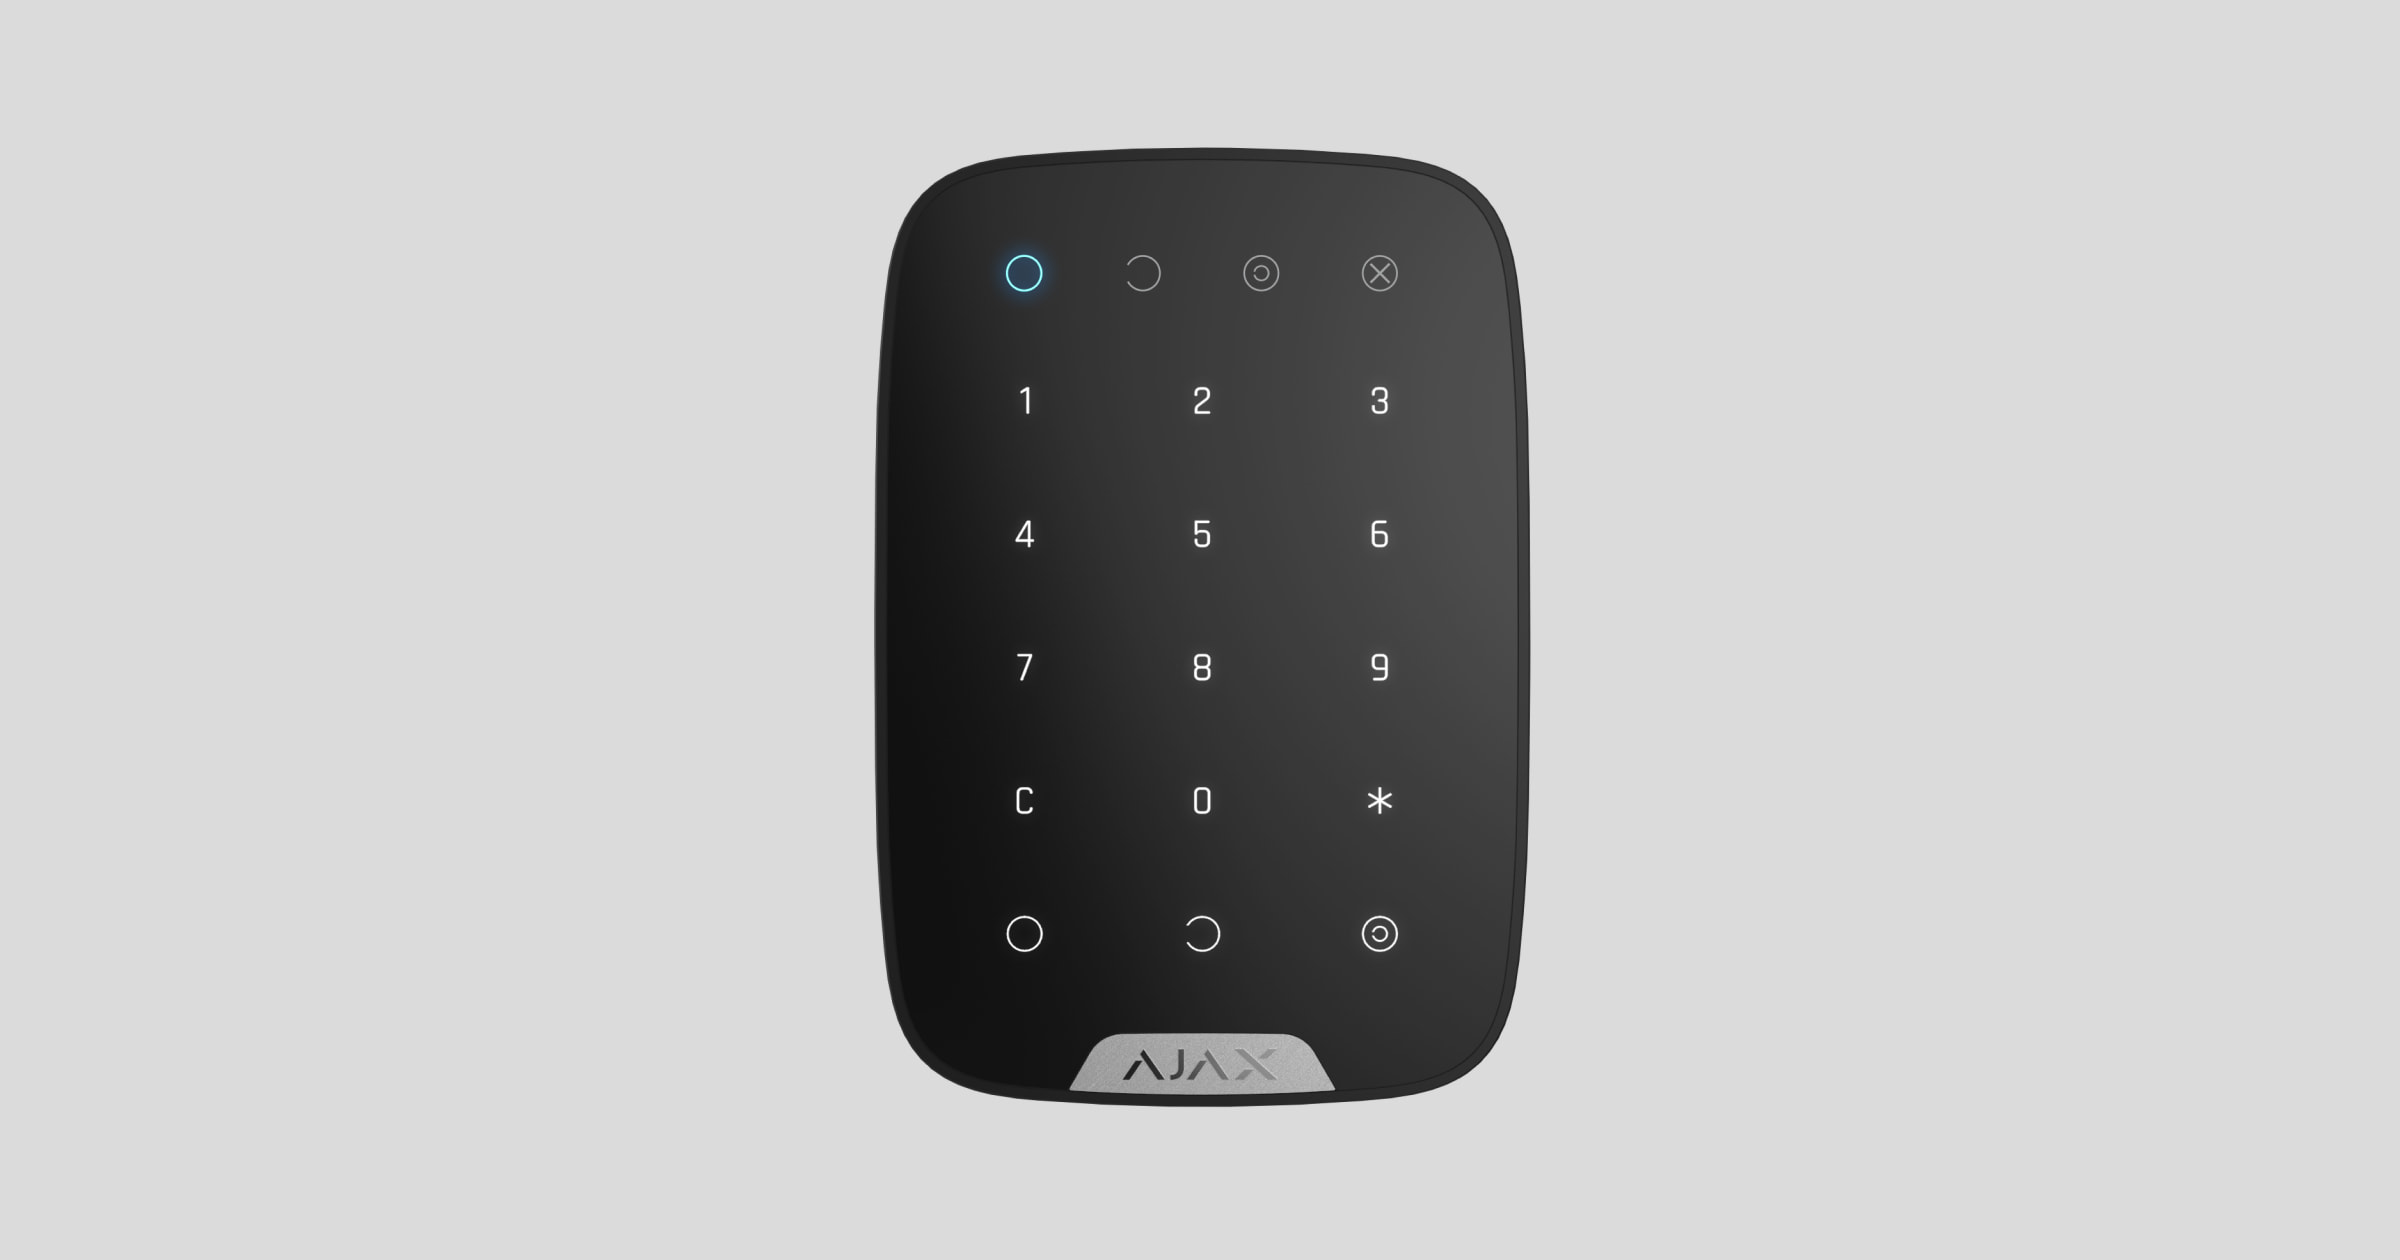
KeyPad is a wireless indoor touch-sensitive keyboard managing the Ajax system. Designed for indoor use. With this device, the user can arm and disarm the system and see its security status. KeyPad is protected against attempts to guess the code and can raise a silent alarm when the code is entered under duress.
Connecting to the Ajax system via a secured Jeweller radio protocol, KeyPad communicates with the hub at a distance of up to 1,700 m in line of sight.
KeyPad operates with Ajax hubs only and does not support connecting via ocBridge Plus or uartBridge integration modules.
The device is set up via the Ajax apps for iOS, Android, macOS, and Windows.
Functional elements
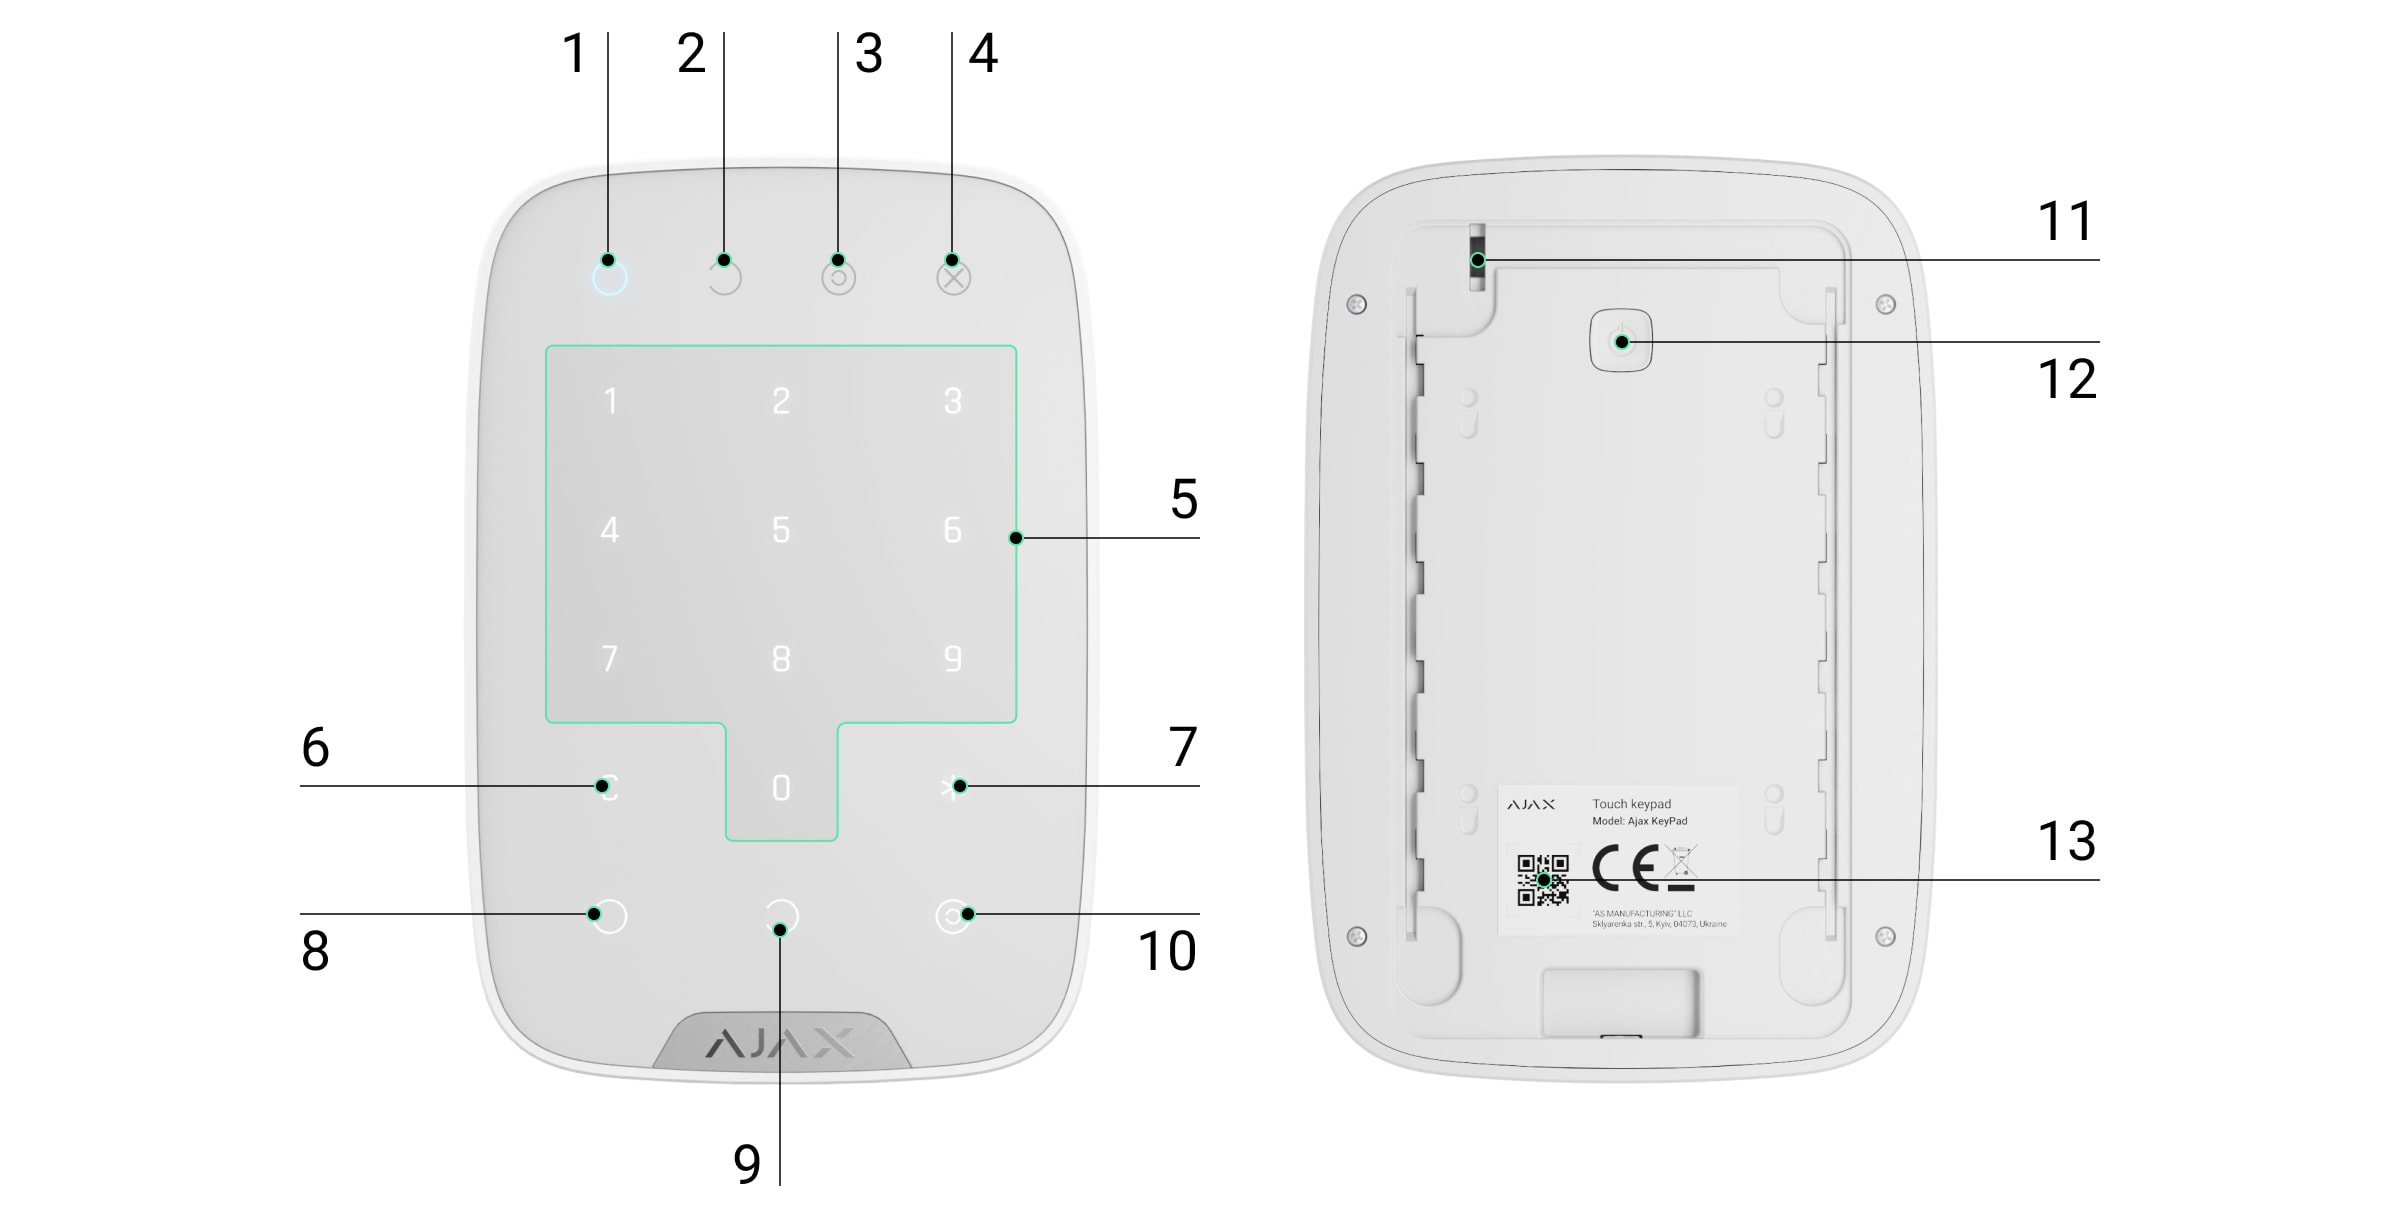
- Armed mode indicator
- Disarmed mode indicator
- Night Mode indicator
- Malfunction indicator
- The block of numerical buttons
- Clear button
- Function button
- Arm button
- Disarm button
- Night Mode button
- Tamper button
- On/Off button
- QR code
To remove the SmartBracket panel, slide it down (perforated part is required for actuating the tamper in case of any attempt to tear off the device from the surface).
Operating Principle
KeyPad is a touch keypad for managing the Ajax system. It controls the security modes of the entire object or individual groups and allows activating the Night Mode. The keyboard supports the “silent alarm” function — the user informs the security company about being forced to disarm the security system, and is not exposed by the siren sounds or Ajax apps.
You can control the security modes with KeyPad using codes. Before entering the code, you should activate (“wake up”) the keypad by touching it. When it is activated, the button backlight is enabled, and the keypad beeps.
KeyPad supports code types as follows:
- Keypad Code — general code that is set up for the keypad. When used, all events are delivered to Ajax apps on behalf of the keypad.
- User Code — personal code that is set up for users connected to the hub. When used, all events are delivered to Ajax apps on behalf of the user.
- Keypad Access Code — set up for a person who is not registered in the system. When used, events are delivered to Ajax apps with a name associated with this code.
- RRU code is an access code for the rapid response units (RRU) activated after the alarm and valid for a specified period. When the code is activated and used, events are delivered to Ajax apps with a title associated with this code.
The number of personal, access, and RRU codes depends on the hub model.
Access codes are not supported by the Hub (2G) Jeweller control panel.
The brightness of the backlight and the volume of the keypad are adjusted in its settings. With the batteries discharged, the backlight turns on at the minimum level regardless of the settings.
If you do not touch the keypad for 4 seconds, KeyPad reduces the brightness of the backlight, and 8 seconds later goes into power-saving mode and turns off the display. As the keypad goes into power saving mode, it resets the commands entered!
KeyPad supports 4 to 6 digit codes. Entering the code should be confirmed by pressing one of the buttons: ![]() (arm),
(arm), ![]() (disarm)
(disarm) ![]() (Night Mode). Any characters typed by mistake are reset with button
(Night Mode). Any characters typed by mistake are reset with button ![]() (Reset).
(Reset).
KeyPad also supports control of security modes without entering a code, if the “Arming without Code” function is enabled in the settings. This function is disabled by default.
Function button
KeyPad has a Function button that operates in 3 modes:
- Off — the button is disabled. Nothing happens after clicking.
- Alarm — after the Function button is pressed, the system sends an alarm to the monitoring station of the security company, to users, and activates the sirens connected to the system.
- Mute Interconnected Fire Detectors Alarms — after the Function button is pressed, the system disables the sirens of Ajax fire detectors. The option works only if Interconnected FireProtect Alarms is enabled (Hub → Settings → Service → Fire detectors settings).
Duress Code
Duress Code allows you to simulate alarm deactivation. Unlike the panic button, if this code is entered, the user will not be compromised by the siren sounding, and the keypad and Ajax app will inform about the successful disarming of the system. At the same time, the security company will receive an alarm.
The following types of duress codes are available:
- Keypad Code — general duress code. When used, events are delivered to Ajax apps on behalf of the keypad.
- User Duress Code — personal duress code, set up for each user connected to the hub. When used, events are delivered to Ajax apps on behalf of the user.
- Keypad Access Сode — duress code set up for a person who is not registered in the system. When used, events are delivered to Ajax apps with a name associated with this code.
Unauthorized access auto-lock
If a wrong code is entered three times within 1 minute, the keypad will be locked for the time specified in the settings. During this time, the hub will ignore all codes and inform the users of the security system and the CMS about an attempt to guess the code.
The keypad will automatically unlock after the lock time defined in the settings expires. However, user or PRO with admin rights can unlock the keypad through the Ajax app.
Two-stage arming
KeyPad participates in arming in two stages. When this feature is enabled, the system will only arm after being re-armed with SpaceControl or after a second-stage detector is restored (for example, by closing the front door on which DoorProtect is installed).
Jeweller data transfer protocol
The keypad uses the Jeweller radio protocol to transmit events and alarms. This is a two-way wireless data transfer protocol that provides fast and reliable communication between the hub and the connected devices.
Jeweller supports block encryption with a floating key and authentication of devices at each communication session to prevent sabotage and device spoofing. The protocol involves regular polling of devices by the hub at intervals of 12 to 300 seconds (set in the Ajax app) to monitor communication with all devices and display their statuses in the Ajax apps.
Sending events to the monitoring station
The Ajax system can transmit alarms to the PRO Desktop monitoring app as well as the central monitoring station (CMS) via SurGard (Contact ID), SIA (DC-09), ADEMCO 685, and other proprietary protocols. See the list of CMSs to which you can connect the Ajax system here.
KeyPad can transmit the following events:
- Duress code is entered.
- The panic button is pressed (if the Function button works in the panic button mode).
- The keypad is locked due to an attempt to guess a code.
- Tamper alarm/recovery.
- Hub connection loss/restoration.
- The keypad is permanently deactivated/activated.
- Unsuccessful attempt to arm the security system (with Integrity Check enabled).
When an alarm is received, the operator of the security company monitoring station knows what happened and where to send the fast response team. The addressability of each Ajax device allows you to send not only events but also the type of the device, the security group, the name assigned to it, and the room to the PRO Desktop or to the CMS. The list of transmitted parameters may differ depending on the type of the CMS and the selected communication protocol.
The device ID and the number of the loop (zone) can be found in its states in the Ajax app.
Indication

When touching KeyPad, it wakes up highlighting the keyboard and indicating the security mode: Armed, Disarmed, or Night Mode. The security mode is always actual, regardless of the control device that was used to change it (the key fob or app).
| Event | Indication |
| Malfunction indicator X blinks | Indicator notifies about lack of communication with hub or keypad lid opening. You can check the reason for malfunction in the Ajax Security System app |
| KeyPad button pressed | A short beep, the system’s current arming state LED blinks once |
| The system is armed | Short sound signal, Armed Mode / Night Mode LED indicator lights up |
| The system is disarmed | Two short sound signals, Disarmed LED mode indicator lights up |
| Incorrect passcode | Long sound signal, the keyboard backlight blinks 3 times |
| A malfunction is detected when arming (e.g., the detector is lost) | A long beep, the system’s current arming state LED blinks 3 times |
| The hub does not respond to the command — no connection | Long sound signal, the Malfunction indicator lights up |
| KeyPad is locked after 3 unsuccessful attempts to enter the passcode | Long sound signal, security mode indicators blink simultaneously |
| Low battery | After arming/disarming the system, the Malfunction indicator blinks smoothly. The keyboard is locked while the indicator blinks. When activating KeyPad with low batteries, it will beep with a long sound signal, the Malfunction indicator smoothly lights up and then switches off |
Sound notifications of malfunctions
If any device is offline or the battery is low, KeyPad can notify system users with an audible sound. The keyboards’ LEDs Х will blink. Malfunction notifications will be displayed in the events feed, SMS text, or push notification.
To enable sound notifications of malfunctions, use Ajax PRO and PRO Desktop apps:
- Click Devices
 , choose hub and open its settings
  :
:
Click Service → Sounds and Alerts - Enable toggles: If battery of any device is low and If any device is offline.
- Click Back to save settings.
Sound notifications of malfunctions settings are available for all hubs (except the Hub model) with firmware version OS Malevich 2.15 or higher.
Sound notifications of malfunctions are supported by KeyPad with firmware version 5.57.1.1 or higher.
| Event | Indication | Note |
| If any device is offline. | Two short sound signals, Malfunction indicator Х blinks twice. Beep once per minute until all devices in the system are online. | Users can delay sound indication for 12 hours. |
| If KeyPad is offline. | Two short sound signals, Malfunction indicator Х blinks twice. Beep once per minute until the keyboard in the system is online. | It’s impossible to delay sound indication. |
| If battery of any device is low. | Three short sound signals, Malfunction indicator Х blinks three times. Beep once per minute until the battery is restored or the device is removed. | Users can delay sound indication for 4 hours. |
Sound notifications of malfunctions appear when the keypad indication is finished. If several malfunctions occur in the system, the keypad will notify about the loss of connection between the device and the hub first.
Connecting
Before connecting the device:
- Switch on the hub and check its Internet connection (the logo glows white or green).
- Install the Ajax app. Create the account, add the hub to the app, and create at least one room.
- Make sure that the hub is not armed, and it does not update by checking its status in the Ajax app.
Only users with admin rights can add a device to the app
How to connect KeyPad to the hub:
- Select the Add Device option in the Ajax app.
- Name the device, scan/write manually the QR Code (located on the body and packaging), and select the location room.
- Select Add — the countdown will begin.
- Switch on KeyPad by holding power button for 3 seconds — it will blink once with the keyboard backlight.
For detection and pairing to occur, KeyPad should be located within the coverage of the wireless network of the hub (at the same protected object).
A request for connection to the hub is transmitted for a short time at the moment of switching on the device.
If KeyPad failed to connect to the hub, switch it off for 5 seconds and retry.
The connected device will appear in the app device list. Update of the device statuses in the list depends on the detector ping interval in the hub settings (the default value is 36 seconds).
There are no pre-set codes for KeyPad. Before using KeyPad, set all necessary codes: keypad code (general code), personal user codes, and duress codes (general and personal).
Selecting the Location
The location of the device depends on its remoteness from the hub, and obstacles hindering the radio signal transmission: walls, floors, large objects inside the room.
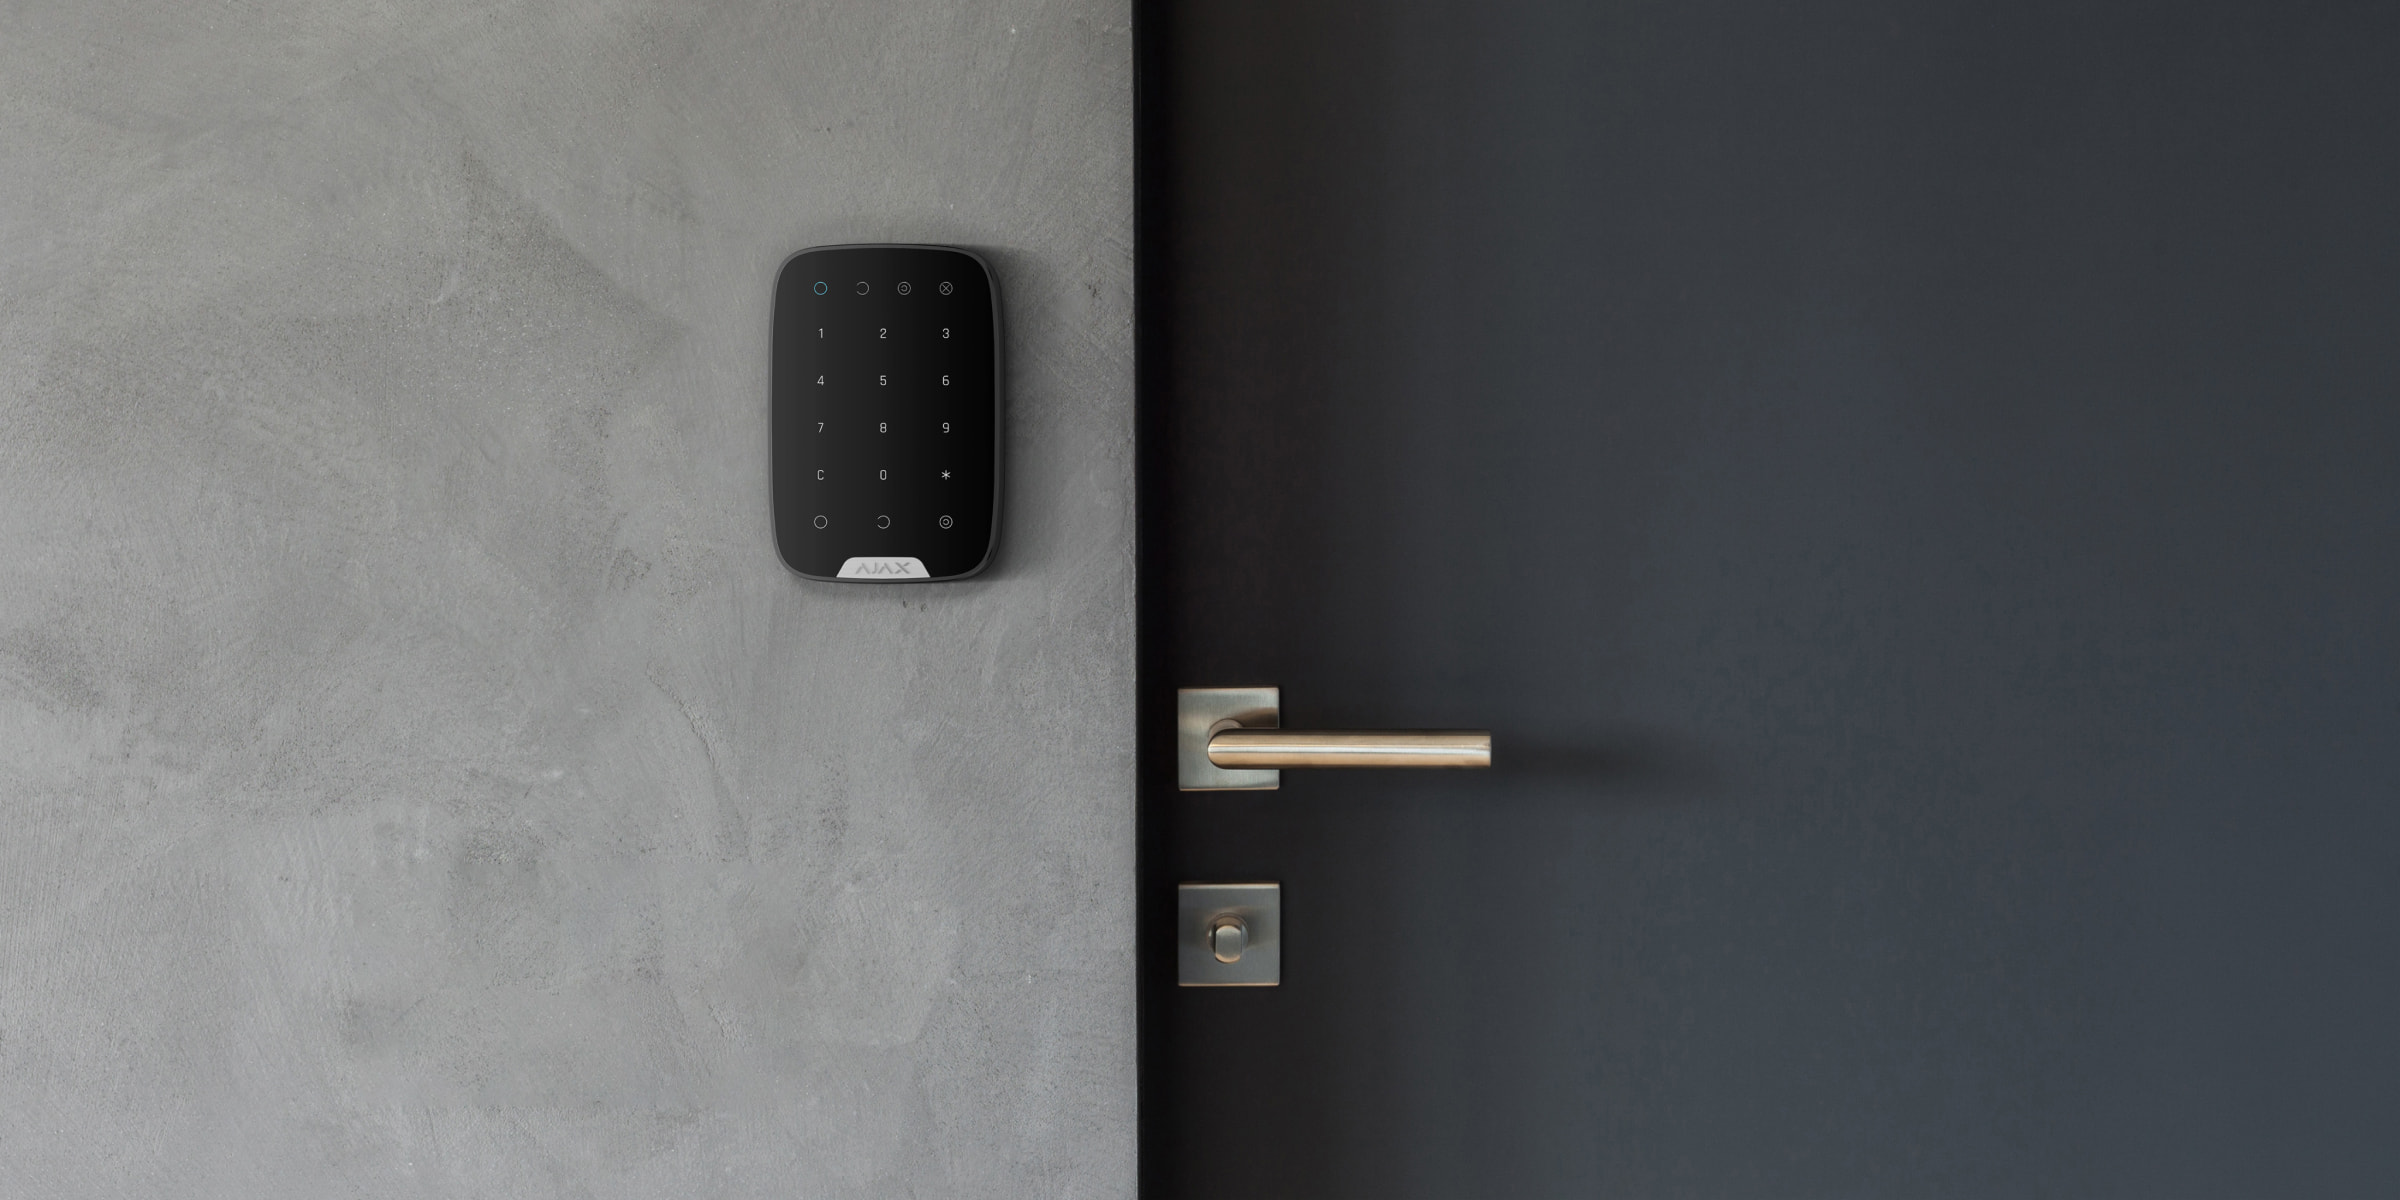
The device developed only for indoor use.
Do not install KeyPad:
- Near the radio transmission equipment, including that operates in 2G/3G/4G mobile networks, Wi-Fi routers, transceivers, radio stations, as well as an Ajax hub (it uses a GSM network).
- Close to electrical wiring.
- Close to metal objects and mirrors that can cause radio signal attenuation or shading.
- Outside the premises (outdoors).
- Inside premises with the temperature and humidity beyond the range of permissible limits.
- Closer than 1 m to the hub.
Check the Jeweller signal strength at the installation location
During testing, the signal level is displayed in the app and on the keyboard with security mode indicators ![]() (Armed mode),
(Armed mode), ![]() (Disarmed mode),
(Disarmed mode), ![]() (Night Mode) and malfunction indicator X.
(Night Mode) and malfunction indicator X.
If the signal level is low (one bar), we cannot guarantee the stable operation of the device. Take all possible measures to improve the quality of the signal. At least, move the device: even a 20 cm shift can significantly improve the quality of signal reception.
If after moving the device still has a low or unstable signal strength, use a radio signal range extender.
KeyPad is designed for operation when fixed to the vertical surface. When using KeyPad in hands, we cannot guarantee successful operation of the sensor keyboard.
States
- Devices
- KeyPad
| Parameter | Meaning |
| Temperature | Temperature of the device. Measured on the processor and changes gradually. Acceptable error between the value in the app and the room temperature — 2°C. The value is updated as soon as the device identifies a temperature change of at least 2°C. You can configure a scenario by temperature to control automation devices. |
| Jeweller Signal Strength | Signal strength between the hub and KeyPad. |
| Battery Charge | Battery level of the device. Two states available:
|
| Lid | The tamper mode of the device, which reacts to the detachment of or damage to the body. |
| Connection | Connection status between the hub and the KeyPad. |
| ReX | Displays the status of using a radio signal range extender. |
| Permanent Deactivation | Shows the status of the device: active, completely disabled by the user, or only notifications about triggering of the device tamper button are disabled. |
| One-Time Deactivation | Shows the status of the device deactivation until the first disarm: active, completely disabled by the user, or only notifications about the device tamper triggering are disabled. |
| Firmware | Keypad firmware version. |
| Device ID | Device identifier. |
Settings
- Devices
- KeyPad
- Settings
| Setting | Meaning |
| Name | Device name, can be edited. |
| Room | Selecting the virtual room to which the device is assigned. |
| Group management | Selecting the security group to which KeyPad is assigned. |
| Access Settings | Selecting the way of verification for arming/disarming:
To activate the Access Codes set up for people who are not registered in the system, select the options on the keypad: Keypad codes only or Keypad and user codes. |
| Keypad Code | Setting a code for arming/disarming. |
| Duress Code | Setting a duress code for silent alarm. |
| Function Button | Selection of the button function *:
|
| Arming without Code | If active, the system can be armed by pressing Arm button without a code. |
| Unauthorized Access Auto-lock | If active, the keyboard is locked for the pre-set time after entering incorrect code three times in a row within 1 minute. During this time, the system cannot be disarmed via KeyPad. |
| Auto-lock Time, min | Lock period after wrong attempts to enter a code. |
| Brightness | Brightness of the keyboard backlight. |
| Buttons Volume | Volume of the beeper. |
| Alert with a siren if panic button is pressed | The setting appears if the Alarm mode is selected for Function button. If active, the Function button pressing triggers the sirens installed at the object. |
| Jeweller Signal Strength Test | Switches the device to the signal strength test mode. |
| Signal Attenuation Test | Switches the KeyPad to the signal fade test mode (available in devices with firmware version 3.50 and later). |
| Permanent Deactivation | Allows the user to disable the device without removing it from the system. Three options are available:
|
| One-Time Deactivation | Shows the status of the keypad one-time deactivation setting. Three options are available:
|
| User Guide | Opens the KeyPad user manual. |
| Delete Device | Disconnects the device from the hub and deletes its settings. |
Configuring codes
Ajax system allows you to set up a keypad code, as well as personal codes for users added to the hub.
With the OS Malevich 2.13.1 update, we have also added the ability to create access codes for people who are not connected to the hub. This is convenient, for example, to provide a cleaning company with access to security management. See how to set up and use each type of code below.
To set keypad code
- Go to keyboard settings.
- Select Keypad Code.
- Set the keypad code you want.
To set the keypad duress code
- Go to keypad settings.
- Select Duress Code.
- Set the keypad duress code you want.
To set a personal code for a registered user:
- Go to profile settings: Hub → Settings → Users → User Settings. In this menu you can also find the user ID.
- Click Passcode Settings.
- Set the User Code and User Duress Code.
Each user sets a personal code individually!
To set an access code for an unregistered person in the system
- Go to the hub settings (Hub → Settings ).
- Select Keypad Access Codes.
- Set up Name and Access Code.
If you want to set up a duress code, change settings for access to groups, Night Mode, code ID, temporarily disable or delete this code, select it in the list and make changes.
PRO or a user with administrator rights can set up an access code or change its settings. This function is supported by hubs with OS Malevich 2.13.1 and higher. Access codes are not supported by the Hub control panel.
To set the RRU code
Only a PRO with the rights to configure the system can create and configure the RRU codes in the Ajax PRO apps. More information about configuring this feature you can find in this article.
The RRU codes are supported by hubs (except the Hub model) with OS Malevich 2.17 and higher.
Controlling security via codes
You can control the security of the entire facility or separate groups using general, personal, or RRU codes, as well as using access codes (configured by PRO or a user with admin rights).
If a personal user code is used, the name of the user who armed/disarmed the system is displayed in notifications and in the hub event feed. If RRU code is used — the title of the RRU code is displayed. If a general code is used, the name of the user who changed the security mode is not displayed.
Keypad Access Codes are supported by hubs (except the Hub model) with OS Malevich 2.13.1 and higher. Hub control panel does not support this function.
The RRU codes are supported by hubs (except the Hub model) with OS Malevich 2.17 and higher.
Security management of the entire facility using a general code
Enter the the general code and press the arming ![]() / disarming
/ disarming ![]() / Night Mode activation
/ Night Mode activation ![]() key.
key.
For example: 1234 → ![]()
Group security management with a general code
Enter the the general code, press the *, enter the group ID and press the arming ![]() / disarming
/ disarming ![]() / Night Mode activation
/ Night Mode activation ![]() key.
key.
For example: 1234 → * → 2 → ![]()
If a group is assigned to the KeyPad (Arming / Disarming permission field in the keypad settings), you do not need to enter the group ID. To manage the arming mode of this group, entering a general or personal user code is sufficient.
Please note that if a group is assigned to the KeyPad, you will not be able to manage Night Mode using a general code.
In this case, Night Mode can only be managed using a personal user code (if the user has the appropriate rights).
Security management of the entire facility using a personal code
Enter user ID, press *, enter personal user code, and press the arming ![]() / disarming
/ disarming ![]() / Night Mode activation
/ Night Mode activation ![]() key.
key.
For example: 2 → * → 1234 → ![]()
Group security management using a personal code
Enter user ID, press *, enter personal user code, press *, enter group ID, and press the arming ![]() / disarming
/ disarming ![]() / Night Mode activation
/ Night Mode activation ![]() .
.
For example: 2 → * → 1234 → * → 5 → ![]()
If a group is assigned to the KeyPad (Arming / Disarming permission field in the keypad settings), you do not need to enter the group ID. To manage the arming mode of this group, entering a personal user code is sufficient.
Security control of the entire object using an access code
Enter the access code and press the arming ![]() / disarming
/ disarming ![]() / Night Mode activation
/ Night Mode activation ![]() key.
key.
For example: 1234 → ![]()
Security management of the group using an access code
Enter the access code, press the *, enter the group ID and press the arming ![]() / disarming
/ disarming ![]() / Night Mode activation
/ Night Mode activation ![]() key.
key.
For example: 1234 → * → 2 → ![]()
Using Duress Code
Duress Code allows you to raise a silent alarm and imitate alarm deactivation. A silent alarm means that the Ajax app and sirens will not shout and expose you. But a security company and other users will be alerted instantly. You can use both personal and general duress codes. You can also set up a duress access code for people not registered in the system.
What is Duress Code and how do you use it
Scenarios and sirens react to disarming under duress in the same way as to normal disarming.
To use a general duress code:
Enter the general duress code and press the disarming button ![]() .
.
For example: 4321 → ![]()
To use a personal duress code of registered user:
Enter user ID, press *, then enter the personal duress code and press the disarming button ![]() .
.
For example: 2 → * → 4422 → ![]()
To use a duress code of a person unregistered in the system:
Enter the duress code set in Keypad Access Codes and press the disarming button ![]() .
.
For example: 4567 → ![]()
Using the RRU code
The RRU code is activated after triggering the alarm during the time configured in the hub settings, and it is valid for a specified period. This ensures that such code will only be used in case of risk, unlike keypad or user codes.
Security control of the object using the RRU code:
Enter RRU Code and press the arming ![]() / disarming
/ disarming ![]() / Night Mode activation
/ Night Mode activation ![]() button.
button.
For example: 1234 → ![]()
Security control of the group using the RRU code:
Enter RRU Code, press *, enter Group ID, and press the arming ![]() / disarming
/ disarming ![]() / Night Mode activation
/ Night Mode activation ![]() button.
button.
For example: 1234 → * → 2 → ![]()
How the fire alarm muting function works
Using the KeyPad, you can mute the interconnected fire detectors alarm by pressing the Function button (if the corresponding setting is enabled). The reaction of the system to pressing a button depends on the state of the system:
- Interconnected Fire Detectors Alarms have already propagated — by the first press of the Function button, all sirens of the fire detectors are muted, except for those that registered the alarm. Pressing the button again mutes the remaining detectors.
- The interconnected alarms delay time lasts — by pressing the Function button, the siren of the triggered Ajax fire detectors is muted.
Learn more about Interconnected Fire Detectors Alarms
With the OS Malevich 2.12 update, users can mute fire alarms in their groups without affecting detectors in the groups to which they do not have access.
Functionality Testing
The Ajax system allows conducting tests for checking the functionality of connected devices.
The tests do not start straight away but within a period of 36 seconds when using the standard settings. The test time start depends on the settings of the detector scanning period (the paragraph on Jeweller settings in hub settings).
Installation
Before installing the detector, make sure that you have selected the optimal location and it is in compliance with the guidelines contained in this manual!
KeyPad should be attached to the vertical surface.
- Attach the SmartBracket panel to the surface using bundled screws, using at least two fixing points (one of them — above the tamper). After selecting other attachment hardware, make sure that they do not damage or deform the panel.

The double-sided adhesive tape may be only used for temporary attachment of KeyPad. The tape will run dry in course of time, which may result in the falling of the KeyPad and damage of the device.
- Put KeyPad on the attachment panel and tighten the mounting screw on the body underside.
As soon as the KeyPad is fixed in SmartBracket, it will blink with the LED X (Fault) — this will be a signal that the tamper has been actuated.
If the malfunction indicator X did not blink after installation in SmartBracket, check the status of the tamper in the Ajax app and then check the fixing tightness of the panel.
If the KeyPad is torn off from the surface or removed from the attachment panel, you will receive the notification.
KeyPad Maintenance and Battery Replacement
Check the KeyPad operating capability on a regular basis.
The battery installed in the KeyPad ensures up to 2 years of autonomous operation (with the inquiry frequency by the hub of 3 minutes). If the KeyPad battery is low, the security system will send the relevant notices, and the malfunction indicator will smoothly lights up and goes out after each successful code entry.

AJAX | Wireless control unit...

AJAX | Wireless control unit...

AJAX | Wireless control unit "Keypad...

AJAX | Wireless control unit "Keypad...

AJAX | RFID card for AJAX KEYPAD PLUS...

AJAX | RFID card for AJAX KEYPAD PLUS...

AJAX | RFID TAG (key chain) Black

AJAX | RFID TAG (key chain) White

AJAX | Wireless control panel with...
