- News
- 8608 views
Installation example: Flush installation
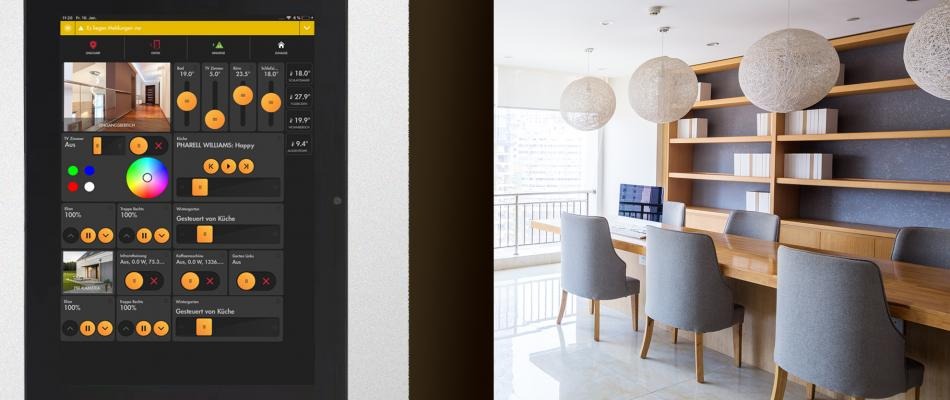
Key features of the LUPUS 10 inch PoE Smarthome Display:
- Ideal for flush wall mounting
- Display only switches on when approaching.
- Android 12 with powerful Rockchip 3588 ARM CPU
- Power supply via the power cable (PoE)
- High-contrast display with 1280x800 pixel resolution
- LUPUS APP preinstalled, third-party applications can be executed via the Playstore.
You have the following options for installing the LUPUS 10 inch PoE Smarthome Display: flush wall installation, surface-mounting using a VESA wall mount or simply on the desk using the included stand.
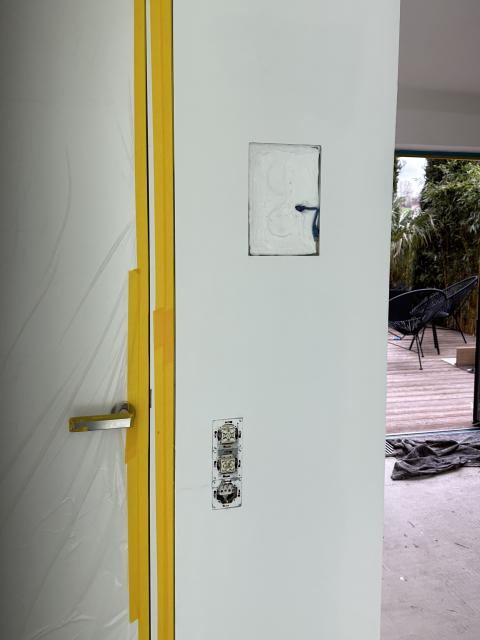
Since this tablet was designed for flush installation, we would like to explain this installation variant to you step-by-step.
- Since the LUPUS 10 inch smart home display can also be powered via PoE, we recommend laying a network cable to the installation location. This saves you the trouble of using a socket and ensures optimal connection quality to your home network.
CAT6 installation cable is ideal here.
- In order to be able to install the tablet, which is almost 3cm thick, flush with the surface, we have to chisel or cut open the masonry if the wall is made of plasterboard.
To do this, it is advisable to hold the tablet with the display side against the wall, align it using a spirit level and then draw the outline on the wall with a pencil.
Note: The neckline can be made 0.5cm larger and 1-2cm deeper.
- Now knock (masonry) or cut (plasterboard) a slot for the network cable.

- Always check for sufficient depth, especially in the area of the connections.
- To create a neat frame for the tablet, we recommend “Göppinger” drywall finishing profiles. Then fill the end profiles and the cable duct.

- To prevent the tablet from slipping into the cavity behind it when operating, you can use the following modeling clay, which dries out after a few days. Use this to fill in the background and then press the tablet, protected with cling film, into the mass. Now wait half a day before removing the tablet again and allowing the mass to harden completely. Don't forget the cables required for operation.
- If the end result is to be a particularly smooth wall in which the tray fits seamlessly, a painter's fleece can be wallpapered as a "finish", which is then finally painted.
Tip: You can use a small suction cup to remove the tablet from the mounting frame.
Related products